Device Setup
Wi-Fi Settings
Connecting the Device for the First Time
-
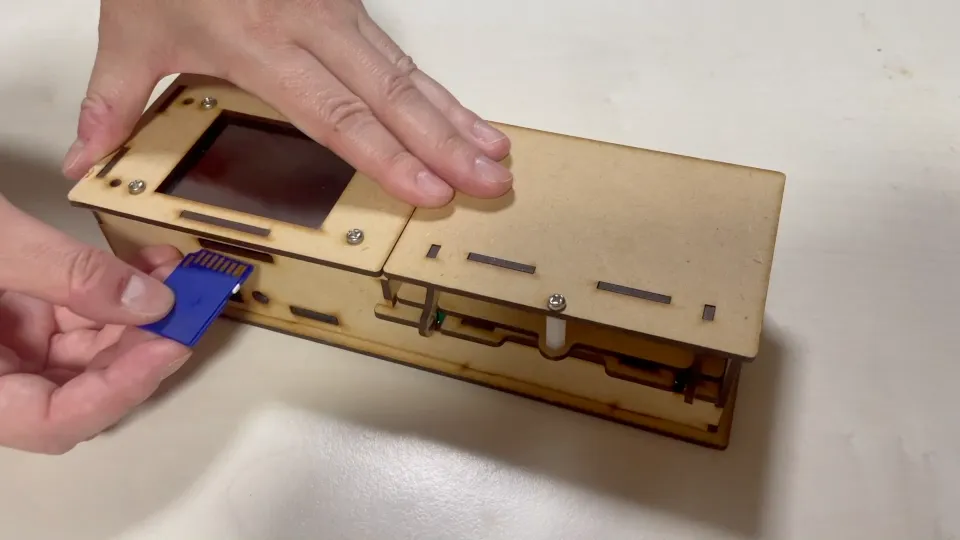
Insert an SD card into the slot on the back of the device. When inserting the SD card, please make sure that the side with the visible metal contacts is facing up.
- Connect the AC adapter and start the device.

- Press the "Setup Wi-Fi" button displayed on the device's screen.
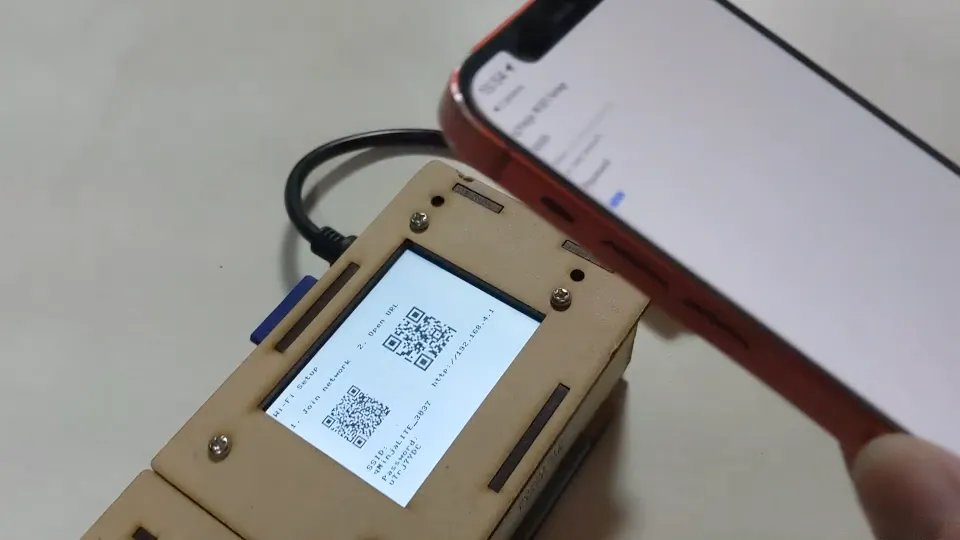
- "SSID" and "Password" will be displayed on the bottom left. Find the corresponding access point in the Wi-Fi settings of your PC or smartphone, and connect to it. At this time, the device is functioning as a Wi-Fi access point. On some smartphones, you can also connect by scanning the QR code displayed on the left with your camera.
- Open the URL (http://192.168.1.1) displayed on the right side in your browser. You can also open it by scanning the QR code displayed on the right with your camera.
-
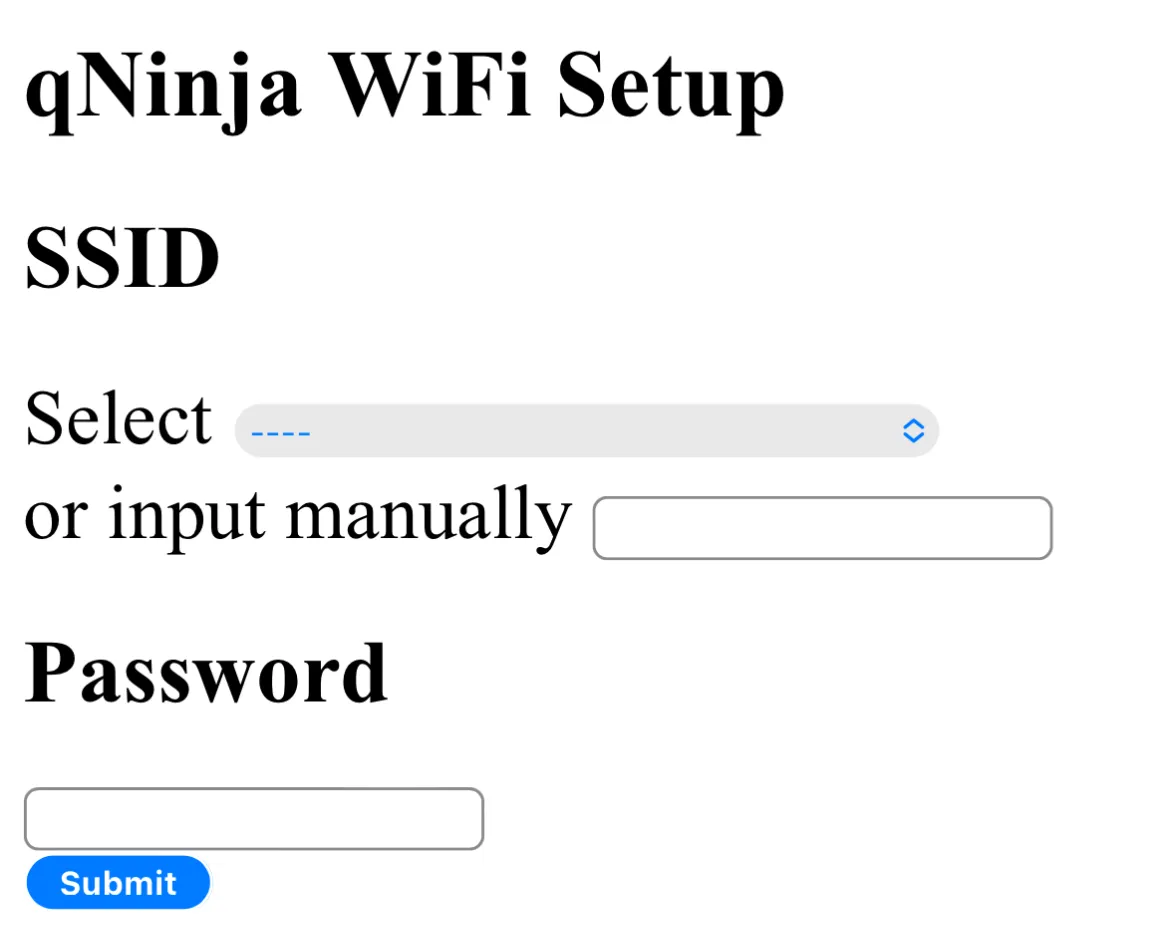
The Wi-Fi settings screen will appear. Please select the access point you wish to connect to from the dropdown menu.
If it is not listed, enter it in the text box.
If a password is required, enter it in the password field text box and press the "Submit" button.
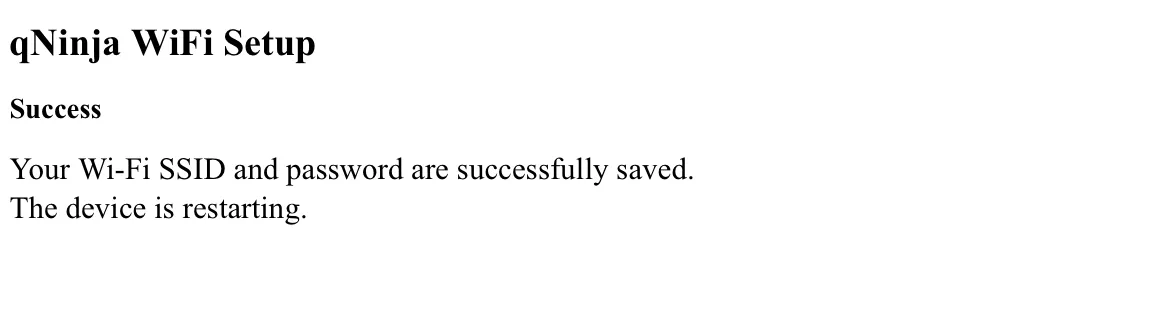
- Once the configuration is complete, the device will restart.
-
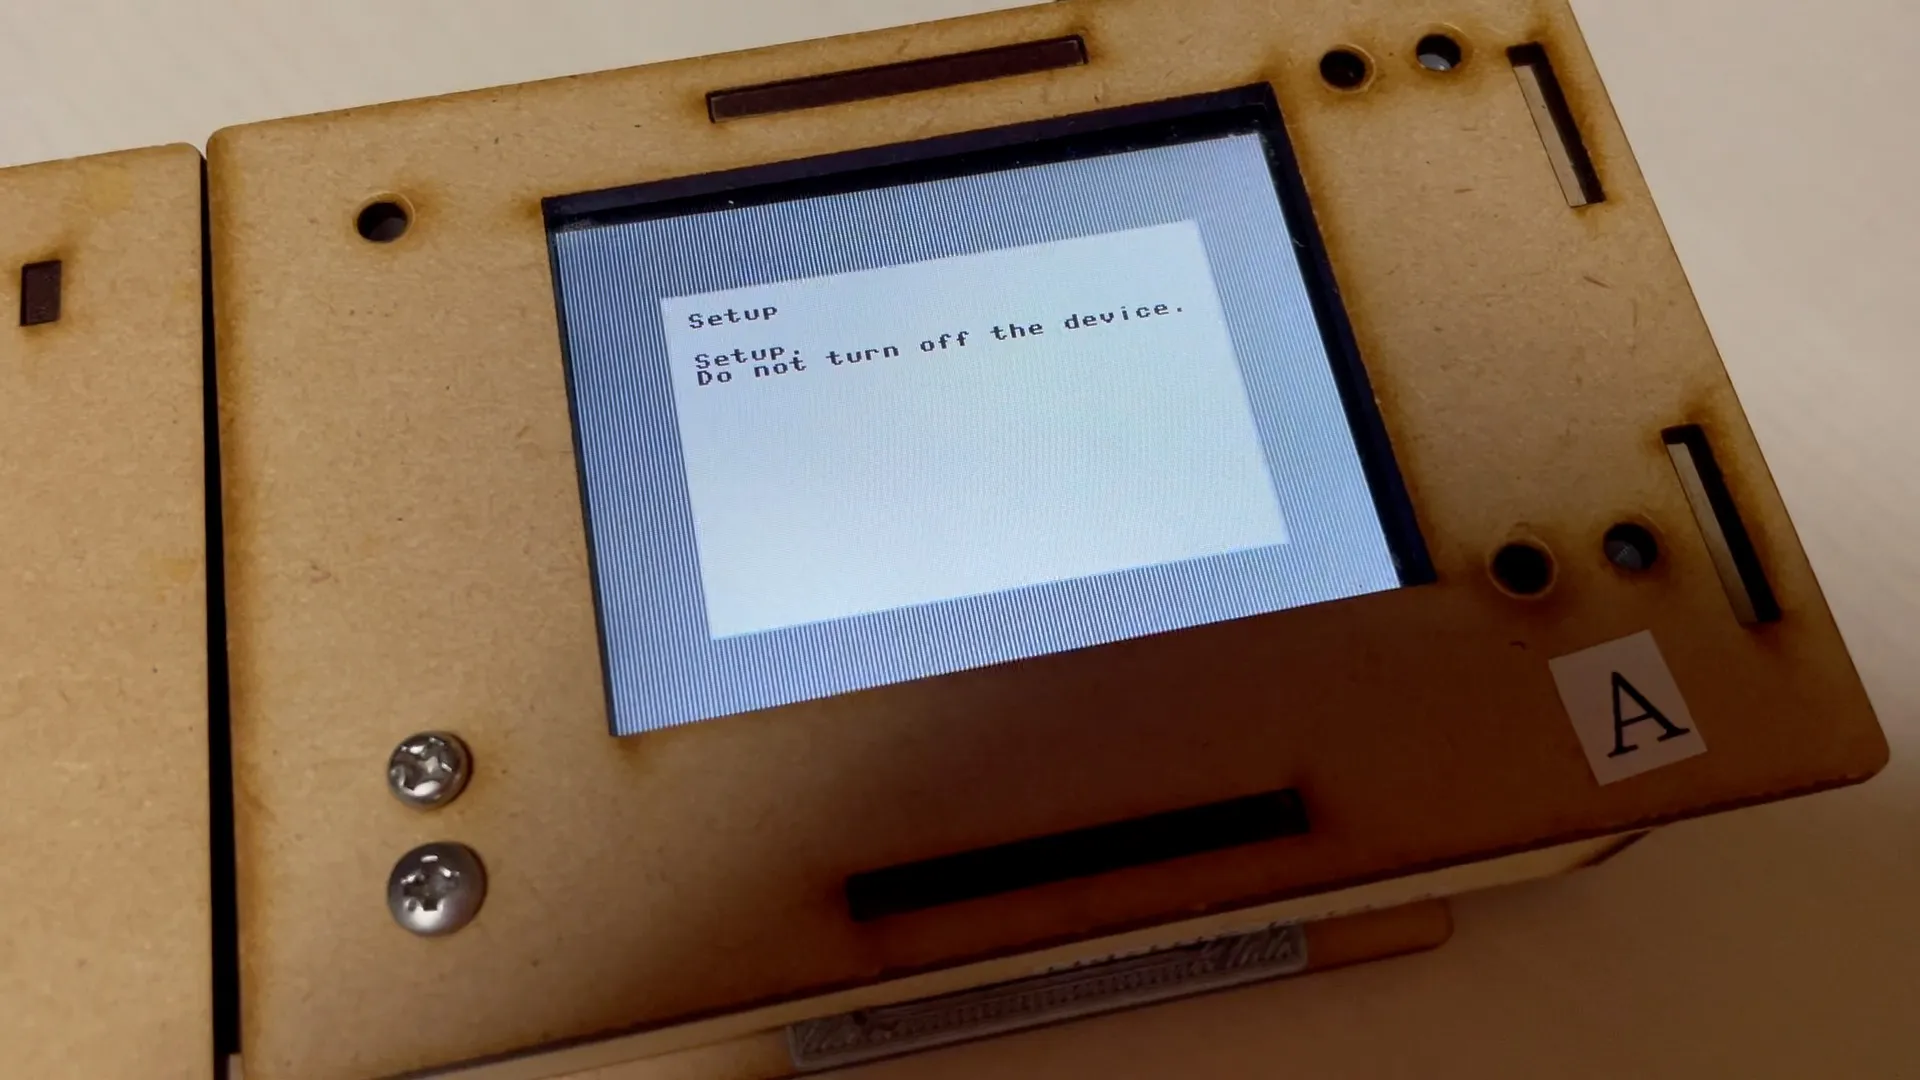
On the first connection to Wi-Fi, the device setup will be performed automatically. During the setup, the dialog as shown in the following image will be displayed.
Initialization may take a few minutes, so please do not turn off the power while the dialog is displayed.
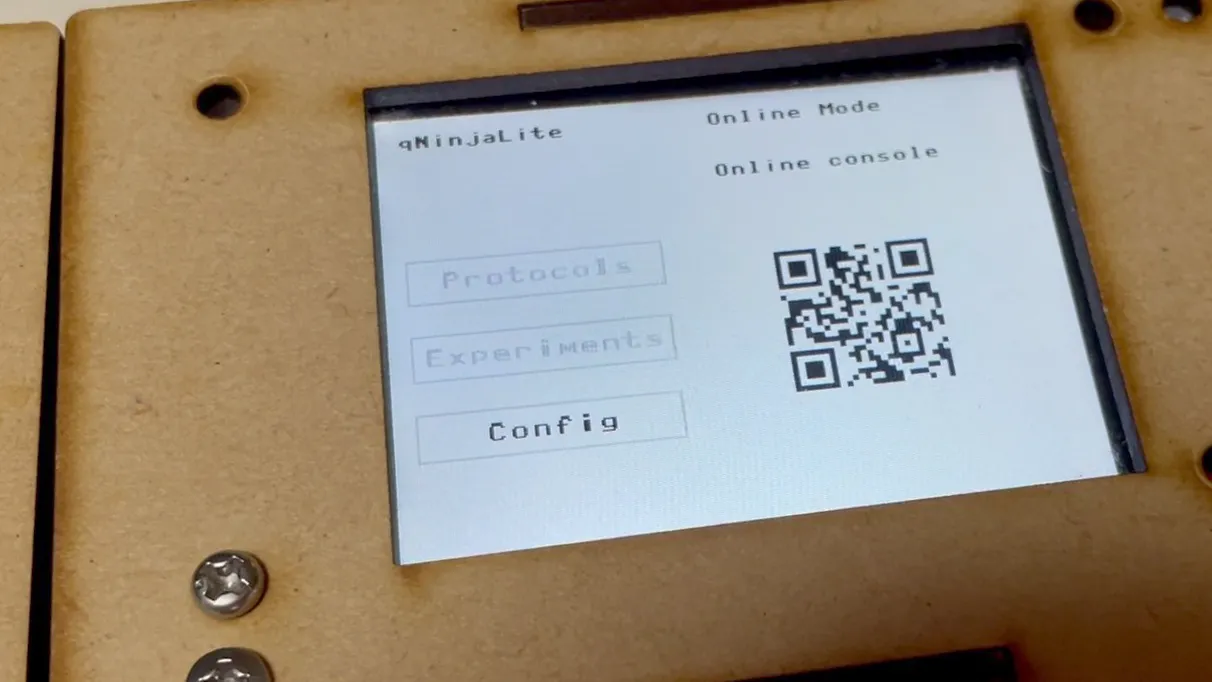
- Once the setup is successful, the device will restart and display the home screen as shown in the following image.
Changing Wi-Fi Settings
After initially setting up Wi-Fi, if you need to change the settings, please follow these steps to reconfigure.
- Connect the AC adapter and start the device.
- (Only if the device setup is complete and connected to Wi-Fi) Press the "Config" button on the home screen, then press the "Go offline" button. The device will restart in offline mode.
- Press the Setup Wi-Fi button.
- Follow the same steps as in "Connecting the Device for the First Time" to set up Wi-Fi.
Registering Your Device with Your Account
You do not need to power on your device for this procedure.
-
To use the device, you must register it with your qNinjaLite account. If you haven't logged in yet, please click the "Login" link at the top right to log in.
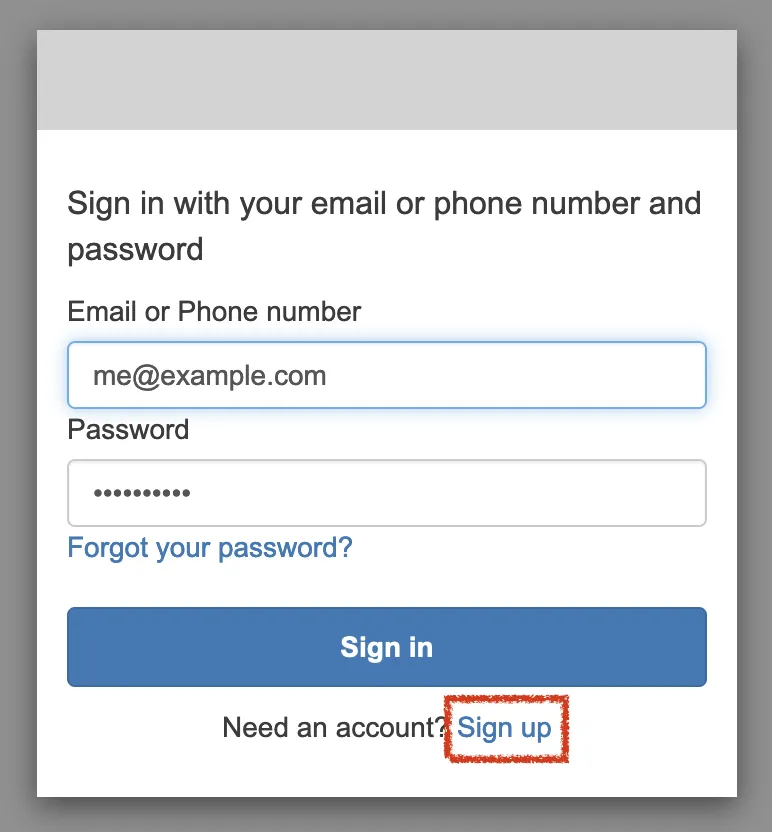
If you do not have an account, click the "Sign up" link below the login dialog, create an account, and then log in. You can create an account with your email address.
- Please click on the device registration link issued at the time of purchase.
- After the device is successfully registered, "This device is activated." will be displayed.
- The registered devices can be viewed in the Device List.
Next Step
Once the device is initialized and registered to your account, you will be able to conduct experiments. Please proceed to the following Experiment.
(Optional) Set Up Your Device Manually
If the automatic setup of the device fails for some reason, you can manually set it up following these steps.
- Ensure that the PC or smartphone you are using to set up is connected to the same network selected in the device's Wi-Fi settings.
- Open the Device List page and choose the device you want to set up.
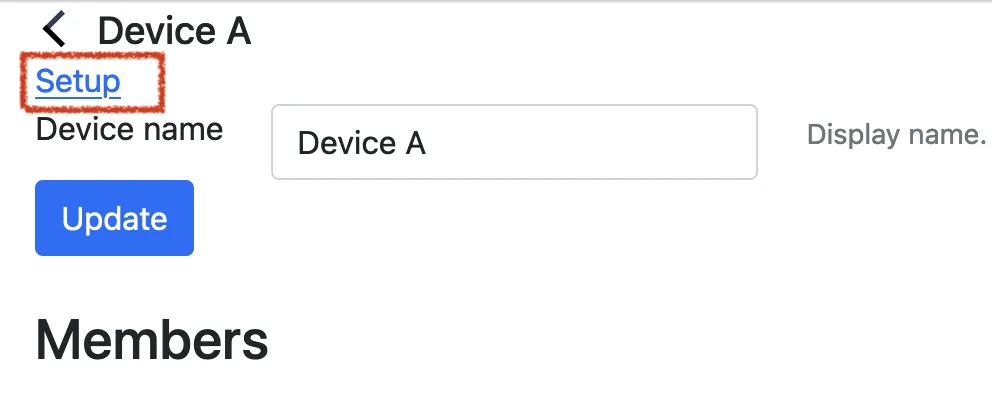
- The device's details page will open. Click the "Setup" button.
- Turn on the device.
- Click the "Start device setup" button displayed on the device's screen.
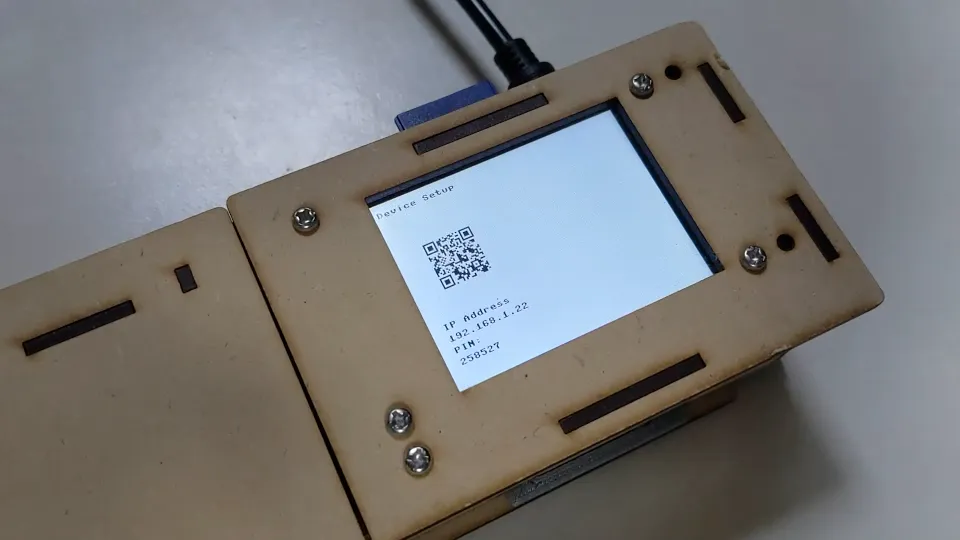
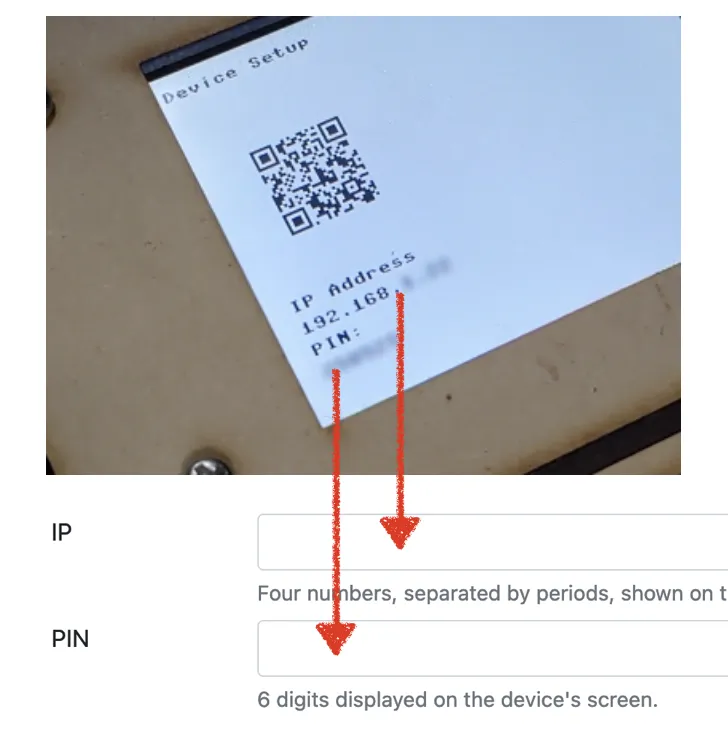
- The IP address and PIN will be displayed, enter them in the text boxes of the browser UI.
- Press the Setup button. In some browsers, a security dialog may appear confirming that you are sending information to another site; please press "OK".
- When the setup is successful, the device will reboot.
デバイスの準備
Wi-Fiの設定
デバイスを初めて接続する場合
-
デバイスの背面のスロットにSDカードを挿入してください。SDカードを挿入する際には、金属の接点が見える面が上向きになるようにしてください。
- ACアダプタを接続し、デバイスを起動してください。
- デバイスの画面に表示された "Setup Wi-Fi" ボタンを押してください。
- デバイスの画面左下に "SSID" と "Password" が表示されます。PCやスマートフォンのWi-Fi設定で、該当するアクセスポイントを探し、接続してください (この時点で、デバイスはWi-Fiアクセスポイントとして機能しています)。 一部のスマートフォンでは、左側に表示された2次元コードをカメラで読み取って接続することもできます。
- 右側に表示されるURL (http://192.168.1.1) をブラウザで開いてください。一部のスマートフォンでは、右側に表示された2次元コードをカメラで読み取ってURLを開くこともできます。
-
Wi-Fi設定画面が表示されます。接続したいアクセスポイントをプルダウンメニューから選んでください。リストにない場合はテキストボックスに入れてください。
パスワードが必要な場合は、パスワード欄のテキストボックスに入力し、"Submit" ボタンを押してください。
- 設定が完了するとデバイスが再起動します。
-
再起動にWi−Fi接続に成功すると、初回は、デバイスのセットアップが自動で行われます。セットアップ中は、次のようなダイアログが表示されます。
初期化には数分間かかる場合がありますので、ダイアログが表示されている間は電源を切らないでください。
- セットアップに成功すると、デバイスは再起動し、次のようなホーム画面が表示されます。
Wi-Fi設定を変更する場合
一度Wi-Fi設定を行った後、設定を変更する場合は、次の手順で再設定を行ってください。
- ACアダプタを接続し、デバイスを起動してください。
- (デバイスセットアップが完了し、Wi-Fiに接続されている場合のみ) ホーム画面で "Config" ボタンを押した後、"Go offline" ボタンを押してください。デバイスがオフラインモードで再起動します。
- "Setup Wi-Fi" ボタンを押してください。
- 「デバイスを初めて接続する場合」と同様の方法でWi-Fiを設定してください。
アカウントにデバイスを登録する
この手続きでは、デバイスを起動する必要はありません。
-
デバイスを利用するには、qNinjaLiteのアカウントにデバイスを登録する必要があります。まだログインしていない場合は、右上の "Login" リンクを押してログインしてください。
アカウントをお持ちでない場合は、ログインダイアログの下の "Sign up" のリンクを押し、アカウントを作成した上でログインしてください。メールアドレスがあればアカウントが作れます。
- 購入時に発行されたデバイス登録用リンクをクリックしてください。
- 登録が完了すると "This device is activated." と表示されます。
- 登録されたデバイスはデバイス一覧に表示されます。
次のステップへ
デバイスが初期化され、アカウトに登録されると、実験を行うことができるようになります。次の「実験」のページに進んでください。
(Optional) 手動でデバイスをセットアップする
デバイスの自動セットアップが何らかの理由で失敗した場合、次のような手順で、手動でセットアップを行うことができます。
- セットアップに使用するPCやスマートフォンが、デバイスのWi-Fi設定で選んだものと同一のネットワークに接続されていることを確認してください。
- デバイス一覧を開き、セットアップしたいデバイスを選んでください。
- デバイスの詳細ページが開くので、"Setup" をクリックします。
- デバイスの電源を入れ、起動します。
- デバイスの画面に表示された "Start device setup" ボタンをクリックします。
- IPアドレスとPINが表示されるので、ブラウザUIのテキストボックスに入力します。
- "Setup" ボタンを押します。ブラウザによっては、別のサイトに情報を送信する旨を確認するセキュリティダイアログが出る場合もありますが、"OK" を押してください。
- セットアップが成功するとデバイスが再起動します。
トラブルシューティング
- 電源が入らない
- ACアダプタは正常に接続されていますか?
- Wi-Fi設定を行ったが、オンラインにならない
- SSIDとパスワードを再確認の上、Wi-Fi設定をやり直してください。
- 自動セットアップに失敗する
- 途中でネットワーク接続が切れた可能性があります。再度電源を投入してください。